Percutaneous cannulation of the internal jugular vein uses anatomic landmarks to guide venipuncture and a guidewire (Seldinger technique) to thread a central venous catheter through the internal jugular vein and into the superior vena cava. Three approaches (central, anterior, and posterior) are used; the central approach is described here.
An internal jugular central venous catheter (CVC) is often selected first because the site is compressible and pneumothorax risk is lower; a subclavian CVC is often preferred when the goal is to reduce infection; a femoral CVC is generally reserved for emergencies or when other sites are not usable. A peripherally inserted central catheter (PICC) is not a first-line substitute for a short-term CVC in the intensive care unit.
Ultrasound guidance for placement of internal jugular lines increases the likelihood of successful cannulation and reduces the risk of complications (1). When ultrasound guidance and trained personnel are available, this method of placement is strongly preferred and the standard of care (2, 3). A landmark approach remains appropriate only if ultrasound is unavailable or delay would be unsafe.
(See also Vascular Access and Central Venous Catheterization.)
Indications for Internal Jugular Vein Cannulation
Secure or long-term venous access that is not available using other sites
Inability to obtain peripheral venous access or intraosseous infusion
IV infusion of fluids and medications for patients in cardiac arrest
IV infusion of medications that may be irritating to veins when administered peripherally (eg, high-concentration fluids, chemotherapy, vasopressors, parenteral nutrition)
IV infusion of high flows or large fluid volumes beyond what is possible using peripheral venous catheters
Hemodynamic monitoring (eg, central venous pressure, central venous oxyhemoglobin saturation, cardiac pressures via pulmonary artery catheters)
Transvenous cardiac pacing or pulmonary arterial monitoring (Swan-Ganz catheter)*
Placement of inferior vena cava filter
* For transvenous cardiac pacing or pulmonary arterial monitoring, a right internal jugular cannulation or a left subclavian vein cannulation typically is preferred.
Contraindications to Internal Jugular Vein Cannulation
Absolute contraindications:
Internal jugular vein thrombosis
Local infection at the insertion site
Antibiotic-impregnated catheter in a patient with an allergy to the specific antibiotic
Relative contraindications:
Coagulopathy, thrombocytopenia, anticoagulant/antiplatelet medications
Local anatomic distortion, traumatic or congenital, or obesity
Superior vena cava syndrome
Severe cardiorespiratory insufficiency or increased intracranial or intraocular pressure (patients will be compromised by Trendelenburg [head down] positioning)
History of prior catheterization of the internal jugular vein (prior catheterization may have resulted in scar tissue formation making catheter placement more difficult)
Uncooperative patient (should be sedated if necessary)
Left bundle branch block (a guidewire or catheter in the right ventricle can induce complete heart block)
* Although percutaneous central venous cannulation carries a low risk of causing bleeding (4), anticoagulant medications (eg, for atrial fibrillation) increase the risk with central venous cannulation, but this risk must be balanced against the increased risk of thrombosis (eg, stroke) if anticoagulation is reversed (5). Discuss any contemplated reversal with the clinician managing the patient's anticoagulation and then with the patient. A femoral line may also be chosen as it is a more easily compressible site.
Complications of Internal Jugular Vein Cannulation
(See also Complications of central venous catheterization.)
Potential complications include:
Arterial puncture
Hematoma
Damage to the vein
Catheter misplacement*
Arrhythmias or atrial perforation, typically caused by guidewire or catheter
Nerve damage
Infection
Thrombosis
* Rare complications due to catheter misplacement include arterial catheterization, hydrothorax, hydromediastinum, and damage to the tricuspid valve.
Guidewire or catheter embolism also rarely occurs (6).
To reduce the risk of venous thrombosis and central line-associated bloodstream infection (CLABSI), CVCs should be removed as soon as they are no longer needed (7).
Equipment for Internal Jugular Vein Cannulation
Sterile procedure, barrier protection
Antiseptic solution (eg, chlorhexidine-alcohol, chlorhexidine, povidone-iodine, alcohol)
Large sterile drapes, towels
Sterile hats, masks, gowns, gloves
Face shields
Seldinger (catheter-over-guidewire) technique
Cardiac monitor
Local anesthetic (eg, 1% lidocaine without epinephrine, approximately 5 mL)
Small anesthetic needle (eg, 25 to 27 gauge, 3 cm [approximately 1 inch] long)
Large anesthetic/finder* needle (22 gauge, 4 cm [approximately 1.5 inches] long)
Introducer needle (eg, thin-walled, 18 or 16 gauge, with internally beveled hub, 6 cm [approximately 2.5 inches] long)
3- and 5-mL syringes (use slip-tip syringes for the finder and introducer needles)
Guidewire, J-tipped
Scalpel (#11 blade)
Dilator
Central venous catheter (adult: 8 French or larger, minimum length for internal jugular catheter is 15 cm [approximately 6 inches] for right side, 20 cm [approximately 8 inches] for left side)
Sterile gauze (eg, 10 × 10 cm [4 × 4 inch] squares)
Sterile saline for flushing catheter port or ports
Nonabsorbable nylon or silk suture (eg, 3-0 or 4-0)
Chlorhexidine patch
Transparent occlusive dressing
* A finder needle is a thinner needle (same needle that is used to administer anesthetic) used for locating the vein before inserting the introducer needle. It is generally recommended for internal jugular vein cannulation that is not guided by ultrasound.
Having 1 or 2 assistants is helpful.
Additional Considerations
Cannulation attempts sometimes fail. Do not exceed 2 or 3 attempts, which increases the risk of complications, particularly with a landmark-based technique (1, 8, 9), and use new equipment with each attempt (ie, do not re-use needles, catheters, or other equipment because they may have become blocked with tissue or blood).
During cardiopulmonary arrest, or even low blood pressure and hypoxia, arterial blood may be dark and not pulsatile and may be mistaken for venous blood.
If the carotid artery is errantly cannulated by either the tissue dilator or the CVC, leave the dilator or catheter in place and obtain surgical consultation for possible surgical removal.
Relevant Anatomy for Internal Jugular Vein Cannulation
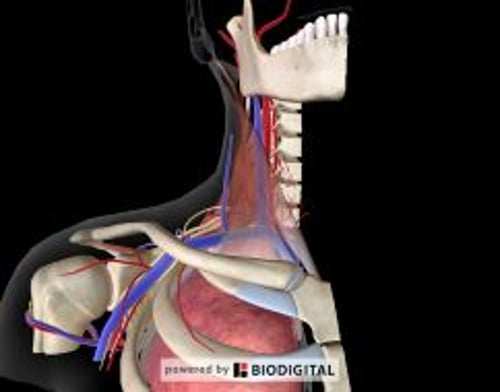
The anterior cervical triangle is bordered by the clavicle inferiorly and by the sternal and clavicular heads of the sternocleidomastoid muscle medially and laterally.
The carotid artery is usually palpated near the lateral side of the sternal head of the sternocleidomastoid, and the internal jugular vein usually lies superficial and lateral (often minimally lateral) to the carotid artery. However, variant orientation of these vessels occurs regularly (in 9 to 19% of patients). The orientation of the carotid artery and internal jugular vein to each other also may change if the position of the patient’s head changes.
Most commonly, the central approach to the internal jugular vein is used, which may decrease the chance of puncture of the pleura or the carotid artery. The introducer needle is inserted at approximately a 30 to 40° angle to the skin at the apex (superior angle) of the anterior cervical triangle, aiming toward the ipsilateral nipple.
The right internal jugular vein is usually preferred over the left for cannulation because it has a larger diameter and affords a straighter path to the superior vena cava.
Positioning for Internal Jugular Vein Cannulation
Raise the bed to a comfortable height for you (ie, so you may stand straight while doing the procedure).
Place the patient supine and in Trendelenburg position (bed tilted head down 15 to 20°) to distend the internal jugular vein and prevent air embolism.
Turn the patient's head only slightly (or not at all) to the contralateral side to expose the internal jugular vein but not cause overlap with the carotid artery.
Stand at the head of the bed.
Step-by-Step Description of Internal Jugular Vein Cannulation
Do a preliminary inspection (nonsterile) to identify the anterior cervical triangle, palpate the carotid arterial pulse, and (optionally) mark the lateral border of the carotid.
Attach the cardiac monitor to the patient and turn it on.
Prepare the equipment
Place sterile equipment on sterilely covered equipment trays.
Use appropriate personal protective equipment.
Draw the local anesthetic into a syringe.
Attach a finder needle to a 5-mL syringe with 1 to 2 mL of sterile saline in it.
Attach the introducer needle to a 5-mL syringe with 1 to 2 mL of sterile saline in it. Align the bevel of the needle with the volume markings on the syringe.
Pre-flush all lines of the CVC with 3 to 5 mL of sterile saline and then close the ports with caps or syringes.
When flushing a central line, use a 10-mL syringe (or one of equal or greater diameter) and do not push too hard to avoid rupturing the line.
Prepare the sterile field
Swab a broad area of skin with antiseptic solution, encompassing the side of the neck, clavicle, and anterior chest to below the ipsilateral nipple. Creating this broad sterile area permits immediately switching to subclavian vein cannulation should the jugular cannulation attempt fail.
Allow the antiseptic solution to dry for at least 1 minute.
Put on sterile mask, hat, gown, and gloves.
Place sterile towels around the site, keeping the ipsilateral nipple exposed.
Place large sterile drapes (eg, a full-body drape) to establish a large sterile field.
Establish the needle insertion path (internal jugular vein, central approach)
Gently palpate the carotid arterial pulse using 3 fingers to appreciate the course of the artery. Palpate gently so as not to compress the adjacent internal jugular vein (a compressed venous lumen is difficult to cannulate).
The needle insertion path: Insert procedural needles (local anesthetic, finder, and introducer needles) into the apical area (superior angle) of the anterior cervical triangle, just lateral to the carotid pulse, at a 30 to 40° angle into the skin, aiming toward the ipsilateral nipple.
Maintain carotid artery palpation during needle insertions and keep the needle lateral to the artery to avoid impaling the artery.
Anesthetize the cannulation site
Place a wheal of anesthetic at the needle entry site and then inject anesthetic into the skin and soft tissues along the anticipated needle insertion path. Maintain gentle negative pressure on the syringe plunger as you advance to identify intravascular placement and prevent an intravascular injection.
If blood returns into the syringe, stop advancing, hold the syringe in place, and now regard this needle as a finder needle. Assess the blood return.
Insert the finder needle
Insert the finder needle along the needle insertion path.
Maintain gentle negative pressure on the syringe plunger as you advance the needle.
Stop advancing when a flash of blood appears in the barrel of the syringe (you may feel the needle pop through the wall as it enters the lumen). Hold the syringe motionless in this spot. Even a slight movement may displace the needle tip from the vein.
If no flash of blood appears in the barrel after approximately 3 to 5 cm of insertion, withdraw the needle slowly. If the needle had initially passed completely through the vein, a flash of blood may now appear as you withdraw the needle tip back into the lumen. If a flash still does not appear, withdraw the needle almost to the skin surface, change direction (usually slightly medially), and try again to advance the needle into the vein. Do not change the direction of the needle while it is fully inserted.
Assess the blood return
Continue to hold the syringe motionless.
Securely grasp the needle hub and also hold it motionless.
Remove the syringe from the needle hub and briefly let blood flow out to confirm that the blood is venous (ie, dark red and flowing but not pulsatile). Then immediately cover the hub with your thumb to stop the blood flow and prevent air embolism.
However, if the blood is bright red and pulsatile (arterial), terminate the procedure. Remove the needle and use gauze squares for 10 minutes to hold external pressure on the area and to help prevent bleeding and hematoma. If the artery is punctured with the dilator, leave it in place and consult vascular surgery immediately.
If it is unclear whether the blood is arterial, attach a short piece of clear IV tubing to the needle; if the blood rises rapidly or pulsates up the tube, it is arterial. The operator can also attach the pressure transducer to the needle directly to check for a venous waveform prior to dilating. Note that arterial blood can appear dark with sluggish flow in hypoxia, shock, hypotension, or cardiac arrest.

Insert the introducer needle, using the finder needle as a guide
Hold the introducer syringe with the needle bevel facing up.
Use one of two insertion methods: Either remove the finder needle and immediately insert the introducer needle along the same path, or keep the finder needle in place and insert the introducer needle underneath and roughly parallel to it (at a slightly shallower angle to the skin).
Stop advancing the introducer needle when a flash of blood appears in the barrel of the syringe. Hold the syringe motionless in this spot.
If the finder needle has not been removed, remove it now.
Assess blood flow from the introducer needle as described in Assess the blood return.
Insert the guidewire
Carefully rotate the introducer syringe such that the bevel of the needle now faces medially (ie, toward the heart and away from the subclavian vein).
Insert the J-curved end of the guidewire into the introducer needle, with the J curve facing medially (ie, in the same direction as the needle bevel).
Advance the guidewire through the needle and into the vein. Do not force the guidewire; it should slide smoothly. Advance the guidewire 10 to 15 cm for a right-sided internal jugular insertion, 15 to 20 cm for a left-sided insertion, or until ectopic heartbeats occur (withdraw the guidewire from this point until ectopy stops).
If you feel any resistance as you advance the guidewire, stop advancing it. Try to gently withdraw the guidewire slightly, rotate it slightly, and then re-advance it, or try to gently withdraw the guidewire entirely, reestablish the needle tip within the vein (confirmed by venous blood return), and then reinsert the guidewire.
However, if you feel any resistance as you withdraw the guidewire, terminate the procedure and withdraw the needle and guidewire together as a unit (to prevent the needle tip from shearing through the guidewire within the patient). Then use gauze squares for 10 minutes to hold external pressure on the area and to help prevent bleeding and hematoma.
Once the guidewire has been inserted, continue to hold it securely in place with one hand and maintain control of it throughout the remainder of the procedure to avoid wire embolism.
Remove the introducer needle (after successful guidewire insertion)
First, securely hold the guidewire distal to the needle and pull the needle from the skin.
Then, securely hold the guidewire at the skin surface and slide the needle down the remaining length of the guidewire to remove the needle.
Widen the insertion tract
Extend the skin insertion site: Using the scalpel, make a small stab incision (approximately 4 mm) into the skin insertion site, avoiding contact with the guidewire, to enlarge the site and allow it to accommodate the larger diameters of the tissue dilator and the catheter.
Advance the tissue dilator over the guidewire: First, grasp the guidewire at the skin and slide the dilator down the length of the guidewire to the skin. Then grasp the guidewire just distal to the dilator, hold the dilator near the skin surface, and use a corkscrew motion as needed to stepwise insert the dilator to pass through the wall of the vein. Maintain your grasp on the guidewire at all times during the insertion.
Remove the dilator: First, securely hold the guidewire distal to the dilator and pull the dilator from the skin. When the guidewire is visible at the skin surface, completely remove the dilator by sliding it down the remaining length of the guidewire.
Maintain your grasp on the guidewire at the skin surface.
If the artery is punctured with the dilator, leave it in place and consult vascular surgery immediately.
Place the catheter
Advance the catheter over the guidewire to the skin surface: Hold the guidewire fixed at the skin surface, thread the catheter tip over the distal end of the guidewire, and slide the catheter down to the skin surface. The distal end of the guidewire should now be protruding from the port hub.
If the distal end of the guidewire is not protruding from the port hub, incrementally advance the guidewire outward from the skin surface while holding the catheter tip close to the skin surface until the guidewire protrudes.
Continue to advance the catheter into the vein: Grasp and control the guidewire where it protrudes from the hub. Hold the catheter near its tip and insert the tip through the skin. Then, in increments of several centimeters and using a corkscrew motion as necessary, stepwise advance the internal jugular catheter. If ectopic heartbeats occur, slowly withdraw the catheter until ectopy stops.
Maintain your grasp on both the guidewire and the catheter.
Remove the guidewire: Withdraw the guidewire while holding the catheter securely in place at the skin surface.
Flush each catheter port with saline: First, draw any air from the line and confirm venous blood flow into the hub. Then, using a 10-mL syringe (or one of equal or greater diameter) and without using excessive force, push 20 mL of saline into the line to clear it.
Dress the site
If the patient is awake or minimally sedated, use 1% lidocaine to anesthetize the skin at the planned suture locations.
Place a chlorhexidine-impregnated disk on the skin at the catheter insertion point.
Suture the skin to the mounting clip on the catheter.
To prevent pulling on the insertion site, suture the catheter at a second site so that a curved or looped segment of catheter lies between the 2 sites.
Apply a sterile occlusive dressing. Transparent membrane dressings are commonly used.
Aftercare for Internal Jugular Vein Cannulation
Prior to using the catheter, do chest radiography to confirm that the tip of a jugular (or subclavian) CVC lies in the superior vena cava near its junction with the right atrium (the catheter can be advanced or retracted if not in the appropriate position) and to confirm that pneumothorax has not occurred.
Warnings and Common Errors for Internal Jugular Vein Cannulation
The tip of a CVC must never lie in the right atrium because the atrium is thin-walled and easily perforated.
Cardiac ectopy may be induced by a guidewire or catheter in the right atrium or ventricle.
Never lose grasp of the guidewire.
During cardiopulmonary arrest, or even low blood pressure and hypoxia, arterial blood may be dark and not pulsatile and may be mistaken for venous blood.
To help prevent air embolism, CVCs should be inserted (and removed) with the vascular cannulation site positioned dependant to the heart.
Excessive head rotation can cause the carotid artery to move directly behind the internal jugular vein. If the needle (or catheter) passes through the back wall of the vein, the artery will be hit.
Tips and Tricks for Internal Jugular Vein Cannulation
A thin finder needle often is used to first find the internal jugular vein (before inserting the larger introducer needle) so that less bleeding and hematoma result if the needle aberrantly impales the carotid artery. (Ultrasound guidance eliminates the need for a finder needle.)
The orientation of the carotid artery and internal jugular vein to each other may change if the position of the patient’s head changes; thus, to avoid impaling the artery, you should gently palpate the carotid pulse during the needle insertions included in this procedure.
The size of the internal jugular vein varies with respiration (maximum diameter in patients not intubated occurs just prior to inspiration [prior to expiration in intubated patients]) and is increased by the Trendelenburg position, the Valsalva maneuver, humming, and external abdominal compression. To increase the chance of successful internal jugular cannulation, advance the introducer at moments of increased jugular diameter.
References
1. Practice Guidelines for Central Venous Access 2020: An Updated Report by the American Society of Anesthesiologists Task Force on Central Venous Access. Anesthesiology. 2020;132(1):8-43. doi:10.1097/ALN.0000000000002864
2. Franco-Sadud R, Schnobrich D, Mathews BK, et al. Recommendations on the Use of Ultrasound Guidance for Central and Peripheral Vascular Access in Adults: A Position Statement of the Society of Hospital Medicine. J Hosp Med. 2019;14(9):E1-E22. doi:10.12788/jhm.3287
3. Frankel HL, Kirkpatrick AW, Elbarbary M, et al. Guidelines for the Appropriate Use of Bedside General and Cardiac Ultrasonography in the Evaluation of Critically Ill Patients-Part I: General Ultrasonography. Crit Care Med. 2015;43(11):2479-2502. doi:10.1097/CCM.0000000000001216
4. Teja B, Bosch NA, Diep C, et al. Complication Rates of Central Venous Catheters: A Systematic Review and Meta-Analysis. JAMA Intern Med. 2024;184(5):474-482. doi:10.1001/jamainternmed.2023.8232
5. Patel IJ, Rahim S, Davidson JC, et al. Society of Interventional Radiology Consensus Guidelines for the Periprocedural Management of Thrombotic and Bleeding Risk in Patients Undergoing Percutaneous Image-Guided Interventions-Part II: Recommendations: Endorsed by the Canadian Association for Interventional Radiology and the Cardiovascular and Interventional Radiological Society of Europe. J Vasc Interv Radiol. 2019;30(8):1168-1184.e1. doi:10.1016/j.jvir.2019.04.017
6. Carroll MI, Ahanchi SS, Kim JH, Panneton JM. Endovascular foreign body retrieval. J Vasc Surg. 2013;57(2):459-463. doi:10.1016/j.jvs.2012.01.092
7. Buetti N, Marschall J, Drees M, et al. Strategies to prevent central line-associated bloodstream infections in acute-care hospitals: 2022 Update. Infect Control Hosp Epidemiol. 2022;43(5):553-569. doi:10.1017/ice.2022.87
8. Calvache JA, Rodríguez MV, Trochez A, Klimek M, Stolker RJ, Lesaffre E. Incidence of Mechanical Complications of Central Venous Catheterization Using Landmark Technique: Do Not Try More Than 3 Times. J Intensive Care Med. 2016;31(6):397-402. doi:10.1177/0885066614541407
9. Schummer W, Schummer C, Rose N, Niesen WD, Sakka SG. Mechanical complications and malpositions of central venous cannulations by experienced operators. A prospective study of 1794 catheterizations in critically ill patients. Intensive Care Med. 2007;33(6):1055-1059. doi:10.1007/s00134-007-0560-z
Drug Information for the Topic