An evaluation of the hand includes a physical examination and sometimes arthrocentesis (see How To Do Metacarpophalangeal and Interphalangeal Joint Arthrocentesis).
(See also Evaluation of the Patient With Joint Symptoms.)
Physical Examination of the Hand

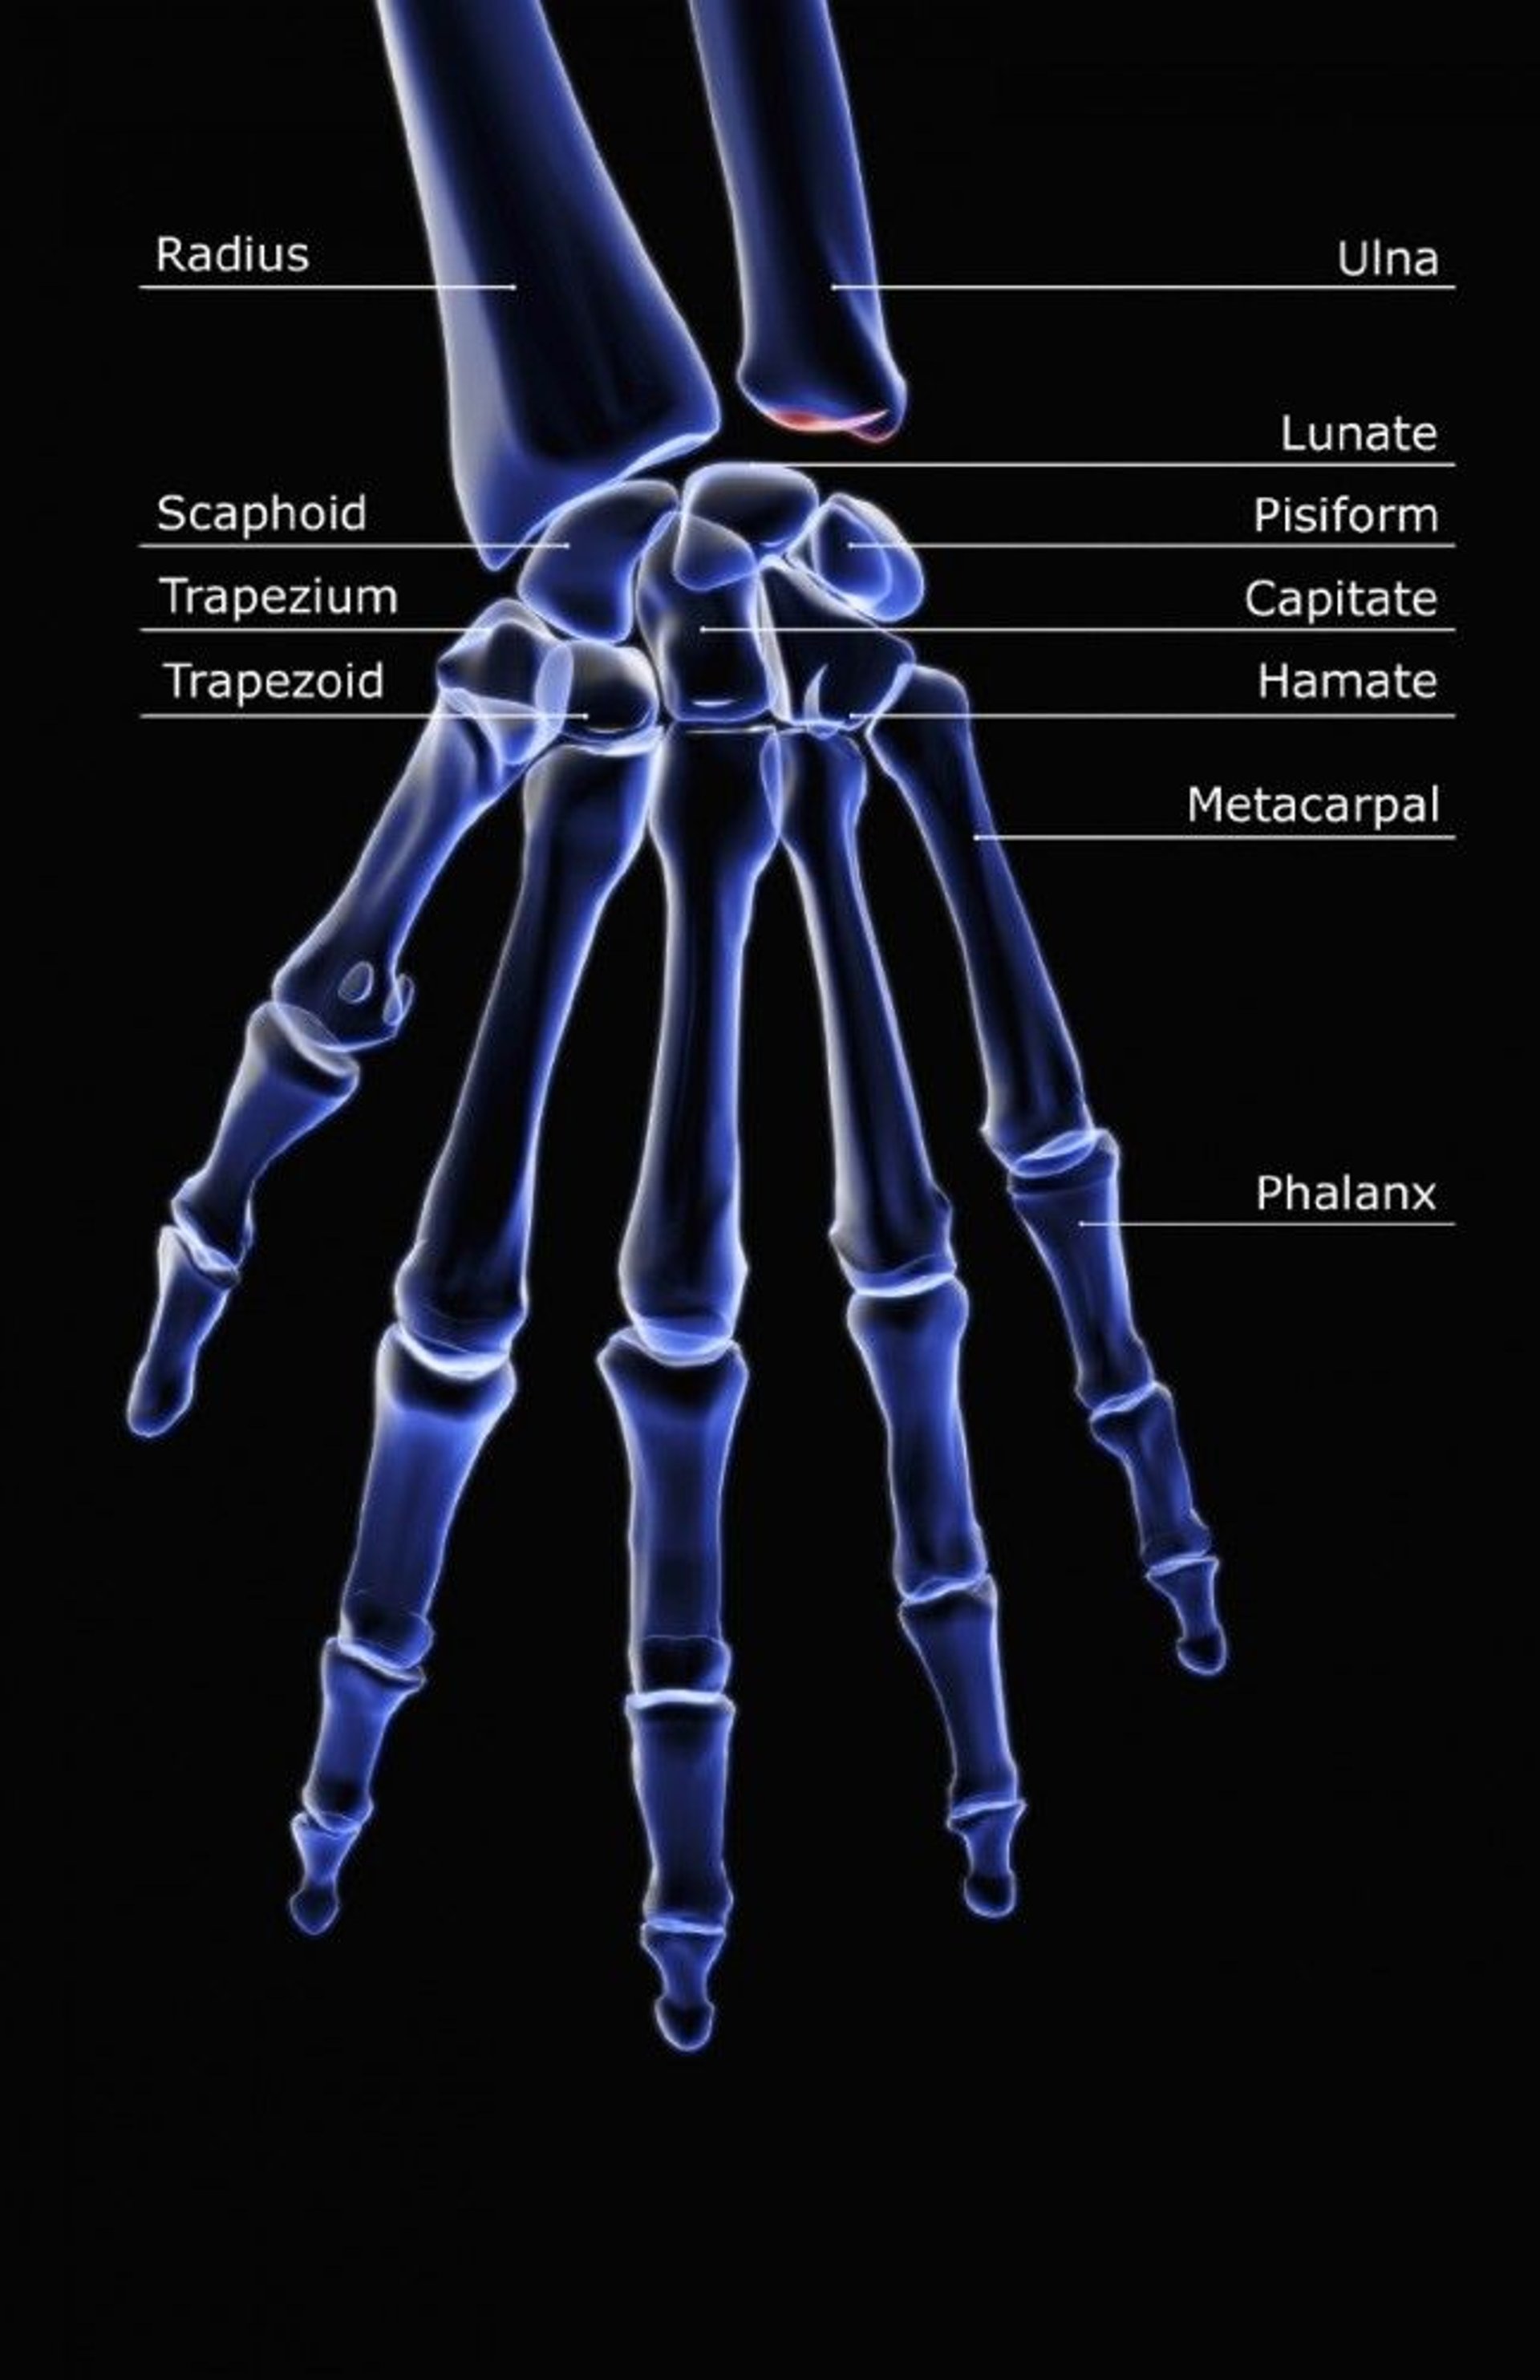
In this view, the triquetrum overlaps (dorsal to) the pisiform and is not labeled.
MEDICAL RF.COM/SCIENCE PHOTO LIBRARY


Physical examination of the hand involves (1)
Inspection
Palpation
Range of motion and strength testing
Tests for impingement
The overall appearance of the hand is assessed. The hand is observed first in the position of function, or rest position; normally, the fingers are flexed uniformly and are not parallel to each other. Instead, they converge and point to a single point on the wrist. The hand is next observed with the fingers straight and flexed 90° at the metacarpophalangeal (MCP) joints; normally, the fingernails should all be parallel in the same plane when viewed end-on. (See also physical examination of hand disorders and Pain in Multiple Joints.)
The hand is inspected for gross deformity, erythema, and swelling, particularly at the MCP and interphalangeal joints. Lesions of the skin and nails are noted, as is muscular atrophy on the dorsum of the hand between the metacarpals, and on the palm, particularly the thenar eminence and hypothenar eminence.
The hand is gently palpated for increased warmth, then is systematically palpated bimanually for tenderness over each of the bones and joints. Use of only one finger to palpate can help isolate a tender or slightly swollen area.
Overall range of motion and strength is tested by having the patient first make a tight fist around the examiner's 1st and 2nd fingers and then fully extending and spreading all the patient's fingers against squeezing resistance by the examiner's thumb and index finger.
Range of motion and strength of each digit is assessed, starting with the thumb individually and its ability to remain opposed to (pinched tightly against) each of the fingertips, as the examiner's index finger tries to pull through the pinch. Each of the fingers is assessed:
The posterior interosseus nerve is tested by having the patient abduct the index finger against resistance, and then the thumb.
The profundus flexor tendons are each isolated by holding the proximal interphalangeal (PIP) joint in place and having the patient flex the fingertip (ie, distal interphalangeal [DIP] joint). The superficialis flexor tendons flex the PIP joints.
Trigger finger is detected by having the patient flex each finger while the examiner palpates the flexor tendon at the distal palmar crease; a nodular catch may be felt in the a1 (first annular) pulley; firm palpation may detect a tender nodule.
Stability of the ulnar collateral ligament (in patients with thumb injury) is detected by stabilizing the MCP joint of the thumb with one hand and applying radial force to the tip of the thumb with the other hand. Comparison to the unaffected side may be necessary.
De Quervain tenosynovitis (inflammation of thumb extensors and abductors) is tested for by having the patient close the fingers over a flexed thumb, followed by gentle passive ulnar deviation, which will cause pain.
Impingement is assessed:
Carpal tunnel syndrome (in patients with numbness or paresthesias of the thumb through long finger) is tested for by direct compression, the Tinel test, and Phalen test. In the Tinel test, tapping over the carpal tunnel causes paresthesias in the fingers innervated by the median nerve, or occasionally radiating up the forearm. In the Phalen test, having the patient hold the wrist flexed at 90° for 1 minute causes paresthesias in the fingers innervated by the median nerve.
Cubital tunnel syndrome (ulnar nerve impingement in the cubital tunnel, in patients with numbness or paresthesias of the little finger, is tested for by tapping on the cubital tunnel, which will cause paresthesias in the little and ring fingers. The cubital tunnel is between the medial epicondyle and olecranon at the elbow.
Digital nerve injury can be assessed by testing two-point discrimination at the fingertips. A calipers or a bent paper clip is used. The test is first demonstrated to the patient and then is done with the patient's eyes shut. A wide gap of the calipers that the patient can clearly distinguish is used first. Touching on the side of the fingertip, sometimes with one point only, and sometimes with two points simultaneously, the gap is gradually narrowed until the patient cannot discriminate one point from two. The shortest distance that the patient can discriminate is measured. The examination is repeated on the unaffected side. Discrimination ability normally should be within about 2 mm on each side.
Reference
1. Kenney RJ, Hammert WC: Physical examination of the hand. J Hand Surg Am 39(11):2324-2334, 2014. doi:10.1016/j.jhsa.2014.04.026